Loading...

How To Add Follow Button On Blog - Slide Out Effect

How To Add Follow Button On Blog - Slide Out Effect - Now, infoBlog will share a tutorial about How To Add Follow Button On Blog - Slide Out Effect by using widget Follow this blog or Join this site that has been provided by Blogger. But, infoBlog will modify that widget by using the slide -out effect. Slide -Out is to hide or show out of something to the surface of the blog.


If there are visitors who are interested in your blog posts, so they can follow your blog by clicking on the button. Follow the steps below To Add Follow Button On Blog With Slide Out Effect . .

How To Add Follow Button On Blog With Slide Out Effect :

  1. Go to your Blogger Dashboard ›› Layout ›› Add a gadget ›› HTML/JavaScript.
  2. Copy and paste the code below.
    <style scoped='' type="text/css"> /*<![CDATA[*/ #infoblogfollowSubscribe{background-color:#464646;width:220px;color:#fff;position:fixed;z-index:999;right:10px;bottom:0} .infoblogfollowButton{background:#464646;color:#fff;font-size:13px;line-height:28px;padding:0 10px;text-decoration:none;position:absolute;top:-28px;right:0;display:block;border-radius:2px 2px 0 0;height:28px;font-weight:700} .infoblogfollowButton span{background:url("https://4.bp.blogspot.com/-fc3-0J--iW8/VyPNjRmxJtI/AAAAAAAAD7U/emRRY6ntYEg3IaL-mev9XxE9M1OKh50fACLcB/s1600/follow-blogger.png") no-repeat scroll 0 3px transparent;padding-left:15px} .infoblogfollowButton:hover,.infoblogfollowButton:focus,.followActive,.followActive:hover{color:#fff} .infoblogfollowButton:hover span,.followActive span{background-position:0 -37px!important} .followactive{background-color:#333} .infoblogfollowForm{padding:15px;margin:auto;text-align:center;font-size:12px} .infoblogfollowForm p{margin:10px 0} .infoblogFollowFooter{text-align:center;font-size:11px;padding:7px 0;margin:0 0 -15px;border-top:1px solid #3c3c3c} .infoblogFollowFooter a{color:#aaa;background:none;text-decoration:none} .infoblogFollowFooter a:hover{color:#fff;background:none} /*]]>*/ </style> <script type="text/javascript"> /*<![CDATA[*/ !function(e){e(document).ready(function(){e.extend(e.easing,{easeOutCubic:function(e,o,t,a,n){return a*((o=o/n-1)*o*o+1)+t}});var o=e("#infoblogfollowSubscribe"),t="-"+o.outerHeight()+"px";o.hide().css({bottom:"-510px"}),setTimeout(function(){o.show().animate({bottom:t})},500),e(".infoblogfollowButton").click(function(a){o.hasClass("followOpened")?(e(this).removeClass("followActive"),o.removeClass("followOpened").stop().animate({bottom:t},{duration:300,easing:"easeOutCubic"})):(e(this).addClass("followActive"),o.addClass("followOpened").stop().animate({bottom:"0"},{duration:500,easing:"easeOutCubic"})),a.preventDefault()})})}(jQuery); /*]]>*/ </script> <div id="infoblogfollowSubscribe" style="bottom: -971px;"> <div class="infoblogfollowForm"> <a class="infoblogfollowButton" href="#" title="Follow"><b>+ Follow</b></a> <br /> <a href="http://www.Blogger.com/follow-blog.g?blogID=6047894897177152059" title="join this site" onclick="window.open(this.href, 'dmfollow', 'toolbar=0,location=0,statusbar=1,menubar=0,scrollbars=no,width=599,height=521');return false;" style="text-align:center;font-weight:bold;text-decoration:none;"><img src="https://1.bp.blogspot.com/-HViEx99kxmQ/VyPMrPGAvEI/AAAAAAAAD7M/bWz5CKpHrHkxtVdgL0z-xJQa_nA_tK0gACLcB/s1600/Follower.png" alt="Join on this site" /></a> <br /> <p>with Google Friend Connect</p> </div> </div>

    *NOTE
    › Replace 6047894897177152059 with your Blog ID. You can see your Blog ID on your blogger browser's search bar like this image.

  3. Finally, click Save.


For Result :


Enough of tutorial about How To Add Follow Button On Blog - Slide Out Effect. If you have any questions or suggestions, please write in the comments field below or directly send questions through the Contact Us service. Hopefully this article useful and you willing to share this article through social media accounts you have.


Thanks For Your Visiting

How To Make Comments Notification On Blog

How To Make Comments Notification On Blog - After two days of not posting the article, this time infoBlog will share a tutorial about How To Make Comments Notification On Blog. Notification is something that gives official information to someone or the act of notifying someone.


Follow the steps below to Make Comments Notification On Blog . .


How To Make Comments Notification :

This widget uses jQuery, so please add the code below before </head>
<script src='https://ajax.googleapis.com/ajax/libs/jquery/1.10.2/jquery.min.js' type='text/javascript'/>
  1. Go to your Blogger Dashboard ›› Template ›› Edit HTML.
  2. Add the code below before ]]></b:skin> or </style>
  3. /* Comments Notification by infoBlog*/ #cm-total { position:fixed; top:14px; right:0; width:188px; text-align:left; z-index:9999; cursor:pointer; } .total-counter { background-color:#d11919; color:white; padding:1px 4px; font-family:Arial,Sans-serif; font-size:11px; border-radius:5px; font-weight:bold; } #notif { position:fixed; top:20px; right:180px; z-index:9999; height:22px; width:19px; opacity:.4; cursor:pointer; } #notif:hover { opacity:1; } .close-notif { position:fixed; top:92px; right:20px; z-index:9999; cursor:pointer; display:none; } #cm-container { width:355px; position:fixed; top:67px; right:0; z-index:9999; background-color:#e5e5e5; padding:60px 20px 10px 20px; color:#666; box-shadow:0 4px 15px -4px rgba(0,0,0,.4) !important; text-align:left; border:1px solid rgba(0,0,0,.2); background-clip:padding-box; display:none; } #cm-container:before { content:url('https://blogger.googleusercontent.com/img/b/R29vZ2xl/AVvXsEiKszgPEQ1R3QKe3zFUbTSdfkj2etxjz1r3empLJ0n2uTzYeDYRwDZ7atLydG93RFiAu4CS0js2eOv57Un-Zrokw8nQS0EzvNTpv_jpGLrqMHASLF-oJYEfsp-kKnqveCBq0OfC9XbFevE/s1600/arrow-notif.png'); position:absolute; top:-14px; left:196px; } #cm-container:after { content:"News Comment"; position:absolute; top:22px; left:150px; text-align:center; font:normal 14px Arial; color:#333; } .cm-outer { margin:0 auto; padding:0; font-size:11px; text-align:left; font:normal 12px Arial; } .cm-outer ul{ margin-bottom:5px; } .cm-outer li { padding:9px 10px 14px; list-style:none; clear:both; position:relative; border-radius: 3px; box-shadow: 0 1px 2px rgba(0,0,0,.2); background-color: white; margin-bottom:10px; } .cm-text {color:#797979;} .cm-outer {margin:0 0 5px} .cm-header {margin: 4px 0 8px 90px;font-size:11px;font-weight:normal !important;} .cm-header a {color:#262626;text-decoration:none;font-size:14px;font-weight:bold} .cm-header a:hover {color:#74a2c3;text-decoration:none;} .cm-outer .cm-content {overflow:hidden} .cm-content {margin-left:90px} .cm-outer img { display:block; float:left; background:#ececec url('https://blogger.googleusercontent.com/img/b/R29vZ2xl/AVvXsEihGVgRQOVfjQmiNOT6wp3zFZKjWjqwjjO166JfI7rfJaGN7fK-HJaXUcXjZj2ebqbxLyO2oFgvNdMsdpx069DQE9Ua2KbpWd8cA8NWc4aQu5IZ4tsWnHSzd4EszEE2feejaZnyatXbQsQ/s1600/anon80.png') no-repeat 50% 50%; overflow:hidden; border-radius:3px 0 0 3px; position:absolute; top:0; left:0; } .cm-footer {margin-top:7px;} .cm-footer a {color:#5886a7;text-decoration:none;} .cm-footer a:hover {color:#74a2c3;text-decoration:none;} div.cm-header img[src=&#39;http://img1.blogblog.com/img/openid16-rounded.gif&#39;] { content: url(http://2.bp.blogspot.com/-8NurYzHIoWQ/Ujc_oLurXII/AAAAAAAAFek/XhAm-oLwg7Q/s80-c/gravatar.png); }
  4. And then, add the code below before </body>
  5. <div id='cm-container'/> <div id='notif' title='Notification'><img alt='notifikasi' src='https://blogger.googleusercontent.com/img/b/R29vZ2xl/AVvXsEisqYid_g4zmSIo64JkcKDD8Apm9E9oDw0jwufOSdTRj0rvk-aPutRlgF7AIr6MSM9pFgVxI-Xksu2BPkxH56vxloJEH4HwIMEaymN6EwA6P_aOSxV2H_RytcAwTt2Tcc9nz9n3pWj77p4/s1600/lonceng.png'/></div> <div id='cm-total'/> <div class='close-notif'><img alt='close' src='https://blogger.googleusercontent.com/img/b/R29vZ2xl/AVvXsEiwGxHBl0q44bPbnTj7qIraZWsVS8UCW56pUQLoozKRaXwFEsdGtokPvWNEp5Kf6B2Xiw-XO4uSkYu_eT2XFIHcsfFx13xKU6iQxPgInRgMxDg6SXugGTFW9_dqg9yBPT6Di5fqM4ach3U/s1600/delete4.png' title='close'/></div> <script> //<![CDATA[ var originalTitle = document.title; var cm_config = { home_page: "http://infoaboutblog.blogspot.co.id/", max_result: 6, t_w: 80, t_h: 80, summary: 40, new_tab_link: true, ct_id: "cm-container", new_cm: " News Comment", interval: 30000, alert: true, alert: function(total) { document.getElementById("cm-total").innerHTML = '<strong class=\'total-counter\'>'+total+'</strong>'; document.title = '(' + total + ') ' + originalTitle; } }; $('#notif').click(function(){$('#cm-container, .close-notif').toggle();});$('.close-notif').click(function(){$('#cm-container, .close-notif').hide();});document.getElementById('notif').onclick = function(){document.title = originalTitle;$('#cm-total').hide();};document.getElementById('show-total').onclick = function(){document.title = originalTitle;$('#cm-total').hide();$('#cm-container').show();}; //]]> </script> <script src='https://googledrive.com/host/0B3pi8P5BWqm1OHB4Zks1aWR0Nnc/notif-komen.js' type='text/javascript'/>

*NOTE
Replace http://infoaboutblog.blogspot.co.id/ with your blog URL


For Result :


Enough of tutorial about How To Make Comments Notification On Blog. If you have any questions or suggestions, please write in the comments field below or directly send questions through the Contact Us service. Hopefully this article useful and you willing to share this article through social media accounts you have.


Thanks For Your Visiting

How To Make Android Apps For Blog - Easy Steps

How To Make Android Apps For Blog - Easy Steps - Technology is growing over time. Now, there are some advanced technologies for example Smartphone. People can find information easily and quickly through applications that can be accessed via Smartphone. It can be utilized for your loyal blog readers to more easily reach your blog.


Then, How To Make Android Apps For Blog? Now, infoBlog will share a tutorial about How To Make Android Apps For Blog.

How To Make Android Apps For Blog :

  1. Visit ›› AppGeyser.com ‹‹
  2. Create an AppGeyser account.
  3. After registering, click CREATE NOW! .
  4. Then, select Website.
  5. Enter your blog URL in the field provided. Then, click Next.
  6. Enter your App name in the field provided. Then, click Next.
  7. Enter your blog description in the field provided. Then, click Next.
  8. Select Custom icon, and then Upload image thumbnails for the application you want to create. After that, click Next.
  9. If you are finished, click Create.
  10. Done, your blog application is ready to be downloaded.
infoBlog App - Link Download :


Enough of tutorial about How To Make Android Apps For Blog - Easy Steps. If you have any questions or suggestions, please write in the comments field below or directly send questions through the Contact Us service. Hopefully this article useful and you willing to share this article through social media accounts you have.


Thanks For Your Visiting

How To Make A Demo And Download Button

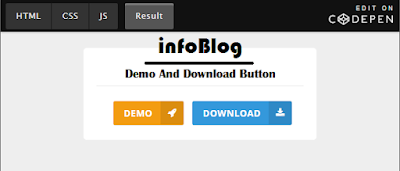
How To Make A Demo And Download Button - At this time, infoBlog will share a tutorial about How To Make A Demo And Download Button by using Font Awesome. On blogs that share templates, movies, and software will need the Demo and Download button.


This time, infoBlog will share a tutorial about How To Make A Demo And Download Button. Follow the steps below . .

How To Make A Demo And Download Button :

This widget uses Font Awesome, so please add the code below before </head>
<link href='//maxcdn.bootstrapcdn.com/font-awesome/4.5.0/css/font-awesome.min.css' rel='stylesheet'/>

  1. Go to your Blogger Dashboard ›› Template ›› Edit HTML.
  2. Add the code below before ]]></b:skin> or </style>

    Style 1


    /* CSS Button Style 1 by www.infoaboutblog.blogspot.com */ .button{float:left;list-style:none;text-align:center;width:95%;margin:10px;padding:2px;font-size:13px;clear:both} .button ul{margin:0;padding:0} .button li{display:inline;margin:5px;padding:0;list-style:none} .button li a.demo,.button li a.download{position:relative;padding:9px 48px 9px 16px;background:#f39c12;color:#fff!important;font-weight:700;font-size:13px;text-align:center;text-transform:uppercase;letter-spacing:0.5px;border-radius:3px;box-shadow:0 1px rgba(0,0,0,0.1);line-height:normal;transition:all .3s} .button li a.download{background:#3498db} .button li a.demo:hover,.button li a.download:hover{background:#666} .button li a.demo:active,.button li a.download:active{cursor:pointer} .button li a.demo:after,.button li a.download:after{content:'\f135';background:rgba(0,0,0,0.1);position:absolute;right:0;top:0;font-weight:normal;display:inline-block;margin:0 0 0 10px;color:#fff;padding:11px;font-family:fontawesome} .button li a.download:after{content:'\f019'}

    Style 2


    /* CSS Button Style 2 by www.infoaboutblog.blogspot.com */ .button2{float:left;list-style:none;text-align:center;width:95%;margin:10px;padding:2px;font-size:13px;clear:both} .button2 ul{margin:0;padding:0} .button2 li{display:inline;margin:5px;padding:0;list-style:none} .button2 li a.demo,.button2 li a.download{position:relative;padding:14px 48px 14px 16px;background:#f39c12;display:block;color:#fff!important;font-weight:700;font-size:13px;text-align:left;text-transform:uppercase;letter-spacing:.2px;border-radius:3px;box-shadow:0 1px rgba(0,0,0,0.1);line-height:normal;transition:all .3s;max-width:170px;margin:auto;overflow:hidden} .button2 li a.download{background:#3498db} .button2 li a.demo:hover,.button2 li a.download:hover{background:#666} .button2 li a.demo:active,.button2 li a.download:active{cursor:pointer} .button2 li a.demo:after,.button2 li a.download:after{content:'\F054';background:rgba(0,0,0,0.1);position:absolute;right:0;top:0;font-weight:normal;display:inline-block;margin:0 0 0 10px;color:#fff;padding:16px 24px;font-family:fontawesome;transition:all .3s} .button2 li:hover a.demo:after,.button2 li:hover a.download:after{background:transparent;-webkit-animation:bounceright .3s alternate ease infinite;animation:bounceright .3s alternate ease infinite} @-webkit-keyframes bounceright{from{-webkit-transform:translateX(0)}to{-webkit-transform:translateX(3px)}} @keyframes bounceright{from{transform:translateX(0)}to{transform:translateX(3px)}}
  3. Then, click  Save Template.

To use this feature, you only use the code below :

Style 1 :

<div style="text-align: center;"> <ul class="button"> <li><a class="demo" href="http://www.infoaboutblog.blogspot.com" target="_blank">Demo</a></li> <li><a class="download" href="http://www.infoaboutblog.blogspot.com" target="_blank">Download</a></li> </ul> </div> <div class="clear"></div>

Style 2 :

<div style="text-align: center;"> <ul class="button2"> <li><a class="demo" href="http://www.infoaboutblog.blogspot.com" target="_blank">Demo Link</a></li> <li><a class="download" href="http://www.infoaboutblog.blogspot.com" target="_blank">Download Link</a></li> </ul> </div> <div class="clear"></div>


*NOTE
Replace http://www.infoaboutblog.blogspot.com to your blog URL
  1. Change Compose mode into HTML mode in your posts. Then paste that code in the HTML column.
  2. After that, replace back in Compose mode and then click Publish to see the result.

Enough of tutorial about How To Make A Demo And Download Button. If you have any questions or suggestions, please write in the comments field below or directly send questions through the Contact Us service. Hopefully this article useful and you willing to share this article through social media accounts you have.


Thanks For Your Visiting